Paper Flower Backdrop DIY (Easy Step-by-Step Guide)
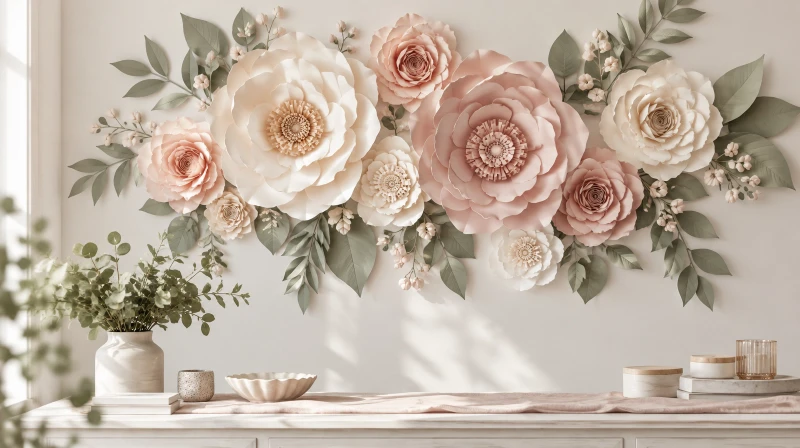
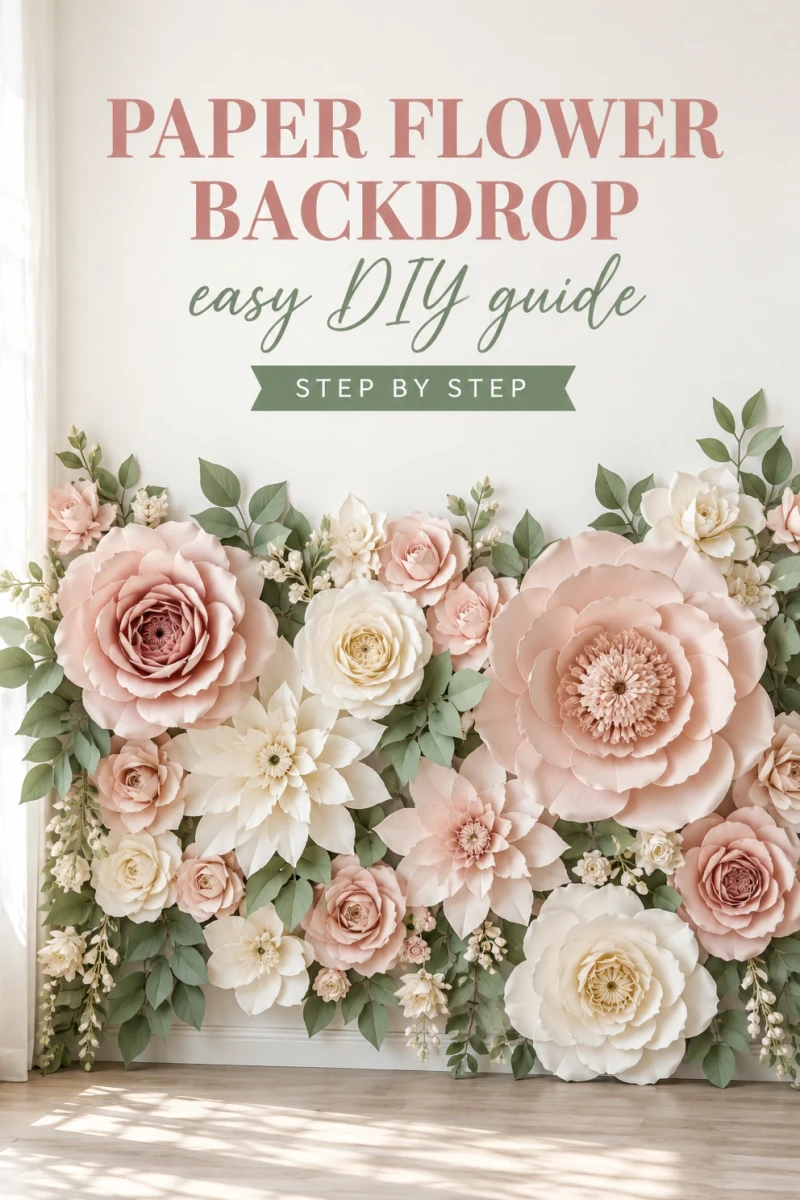
A paper flower backdrop is a stunning decorative focal point: bold, sculptural, highly photogenic, and surprisingly affordable to build yourself. Large dimensional paper blooms on a wall create an enchanting photo booth or dessert table background for baby showers, bridal events, weddings, and milestone birthdays. This comprehensive paper flower backdrop DIY walks you through petal dimensions, cardstock selection, step-by-step flower assembly, wall-mounting techniques, and storage strategies.
At DecorWillow, our primary design guideline is the statement-cluster technique: craft a small core of oversized statement flowers (16 to 18 inches) accompanied by medium and petite filler blooms, then cluster them in an organic crescent. Varying bloom diameters produces rich visual depth, whereas making all flowers identical leaves the backdrop looking flat.
- Best for: birthday photo backdrops, bridal showers, baby showers, and weddings
- Key design rule: cluster mixed bloom sizes (large, medium, and small) with paper leaves
- Reusability: easily reused for 4 to 5+ events when stored in shallow flat boxes
- Estimated budget: $20 to $35 for a standard 4-to-5-foot wall cluster
- Prep schedule: ideal make-ahead project; craft blooms 1 to 2 weeks in advance
Table of Contents
- Why a paper flower backdrop
- What you need (supplies list)
- Petal sizing and flower dimensions
- Step-by-step flower construction
- Choosing sizes and colors
- Arranging the backdrop
- Before and after
- Surface-specific mounting and hanging
- Exact supplies and backdrop scaling guide
- Budget breakdown
- Worth it vs skip
- Small version
- Make-ahead, transport, and storage
- Beginner troubleshooting
- Common mistakes
- Backdrop checklist
- FAQ
- Related articles
Why a paper flower backdrop
Handcrafted paper flowers make a dramatic, high-end decorative impact for a fraction of the cost of fresh floral installations. Unlike balloon arches that deflate within days, paper flower backdrops can be preserved and reused across multiple family celebrations, repurposed in a nursery as wall art, or lent to friends. They hold their crisp architectural shape indoors, photograph without glare, and let you match your celebration’s exact color palette.
What you need (supplies list)
You only need standard papercraft materials to achieve professional results:
- Medium-Weight Cardstock: 65 lb to 80 lb (176 to 216 gsm) smooth cardstock in your chosen color palette. Avoid flimsy 20 lb printer paper (which droops) or heavy 110 lb cardstock (which cracks when curled).
- Adhesives: A hot glue gun with at least 15 to 20 all-temperature or low-temperature glue sticks.
- Curling Tool: A wooden dowel, thick marker, or bone folder to curl petal edges.
- Cardstock Base Plates: Sturdy 3-to-4-inch cardstock or chipboard circles to serve as the structural anchor for each flower.
- Cutting Tools: Sharp detail scissors or a digital craft cutting machine (like a Cricut or Silhouette).
- Mounting Supplies: Removable adhesive strips or hooks. See our how to hang a balloon garland guide for complementary hanging hardware.
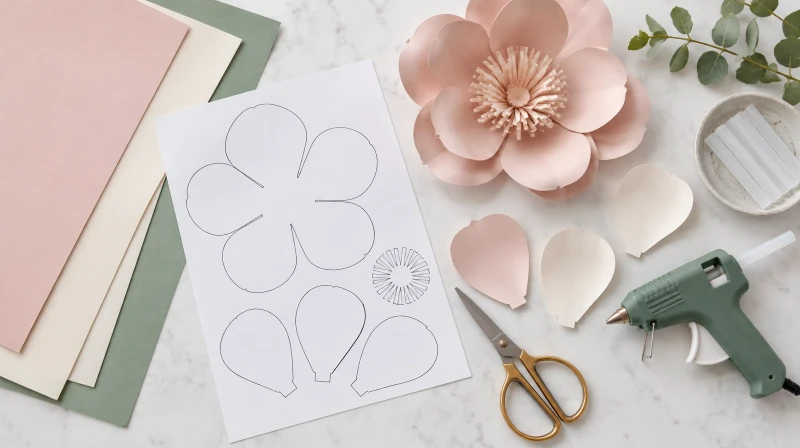 Quality cardstock, sharp scissors, a curling dowel, and hot glue form the core toolkit for paper flower backdrops.
Petal sizing and flower dimensions
To build a balanced, dimensional backdrop, prepare blooms across three distinct size tiers:
| Flower Size | Finished Diameter | Cardstock Weight | Petal Count & Layers | Petal Dimensions (Length x Width) | Sheets Needed | Approx. Assembly Time |
|---|---|---|---|---|---|---|
| Large Statement | 16 – 18 inches | 65–80 lb | 18–24 petals (3 layers of 6–8) | Layer 1: 7” x 5” Layer 2: 6” x 4.5” Layer 3: 5” x 3.5” | 4 – 5 sheets | 15 – 20 mins |
| Medium Filler | 10 – 12 inches | 65 lb | 15–18 petals (3 layers of 5–6) | Layer 1: 5” x 3.5” Layer 2: 4” x 3” Layer 3: 3.5” x 2.5” | 2 – 3 sheets | 10 – 12 mins |
| Petite Accent | 6 – 8 inches | 65 lb | 10–12 petals (2 layers of 5–6) | Layer 1: 3.5” x 2.5” Layer 2: 2.5” x 2” | 1 sheet | 6 – 8 mins |
| Botanical Leaves | 8 – 12 inches | 65–80 lb | 8–12 sprigs (single or double) | 8” x 4” leaf templates | 1 sheet per 2 leaves | 2 – 3 mins |
Step-by-step flower construction
Follow these five sequential stages to build clean, sculptural paper blooms:
- Cut the Petals & Base: Trace and cut petals in graduating sizes. Cut a 3.5-inch circle from scrap cardstock to act as your foundational base plate.
- Create the 3D Cup: Snip a 1-inch vertical slit straight up the bottom center of each petal. Apply a dab of hot glue to one side of the slit, overlap the tabs slightly, and press together. This creates an upward concave curve so the petal stands three-dimensionally.
- Curl the Petal Tips: Place a smooth wooden dowel or thick marker along the top outer edge of each petal and gently roll the paper backward toward the outside.
- Assemble the Concentric Rings: Glue the largest base petals evenly around the outer perimeter of your cardstock base plate. Stagger the second tier of medium petals slightly inward, placing each petal between the seams of the first layer. Repeat with the smallest inner tier.
- Form and Insert the Center Core: Cut a 4-inch by 11-inch strip of contrasting cardstock, fold it lengthwise, and cut fine fringe slits along the folded edge without cutting all the way through. Roll the fringed strip tightly into a pom-pom, secure with hot glue, fluff the fringe outward, and glue firmly into the open center of your flower.
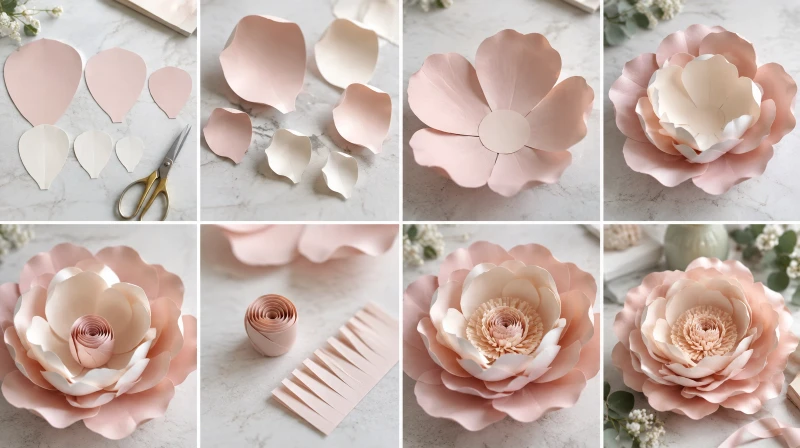 Layering cupped petals from outer ring to inner core creates lifelike depth and structural stability.
Choosing sizes and colors
Varying shades within a single palette produces an organic, designer-grade visual:
- Blush Botanical: Dusty rose, soft blush pink, warm ivory, and sage green foliage sprigs.
- Modern Monochromatic: Layered pure white, textured cream, and warm alabaster with metallic gold leaf accents.
- Earthy Terracotta: Muted peach, burnt terracotta, buttercream, and olive green leaves.
- Bold Garden Party: Coral, marigold yellow, fuchsia, and deep emerald green foliage.
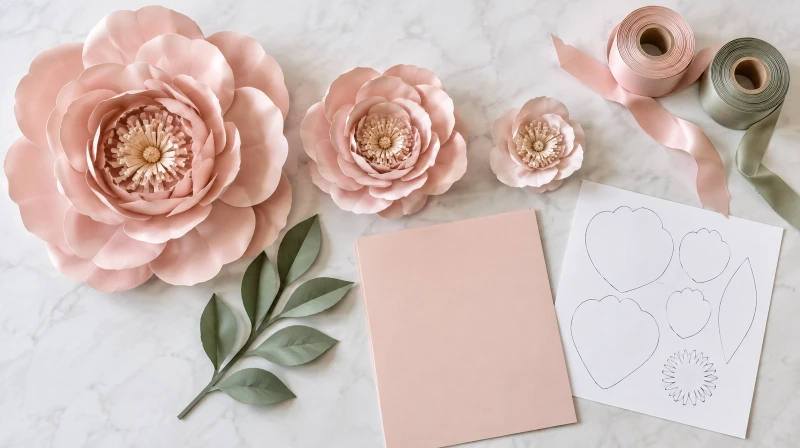 Coordinating cardstock tones with complementary accent foliage ensures a polished, cohesive aesthetic.
Arranging the backdrop
How you arrange your flowers on the wall separates amateur craft projects from professional photo installations:
- The Organic Crescent: Group your 3 largest blooms off-center toward the upper left or lower right corner, tapering outward into medium and small blooms in a sweeping curved arch.
- Tuck Foliage Beneath Seams: Slide paper eucalyptus or monstera leaves under flower rims to soften edges and cover exposed wall sections.
- Angle Bloom Faces: Angle smaller flowers slightly outward rather than facing directly forward to create dynamic shadows under photography lighting.
- Dry-Run Floor Layout: Always lay out your completed flowers and leaves on a rug or bed first. Photograph the mock layout with your phone before adhering anything to the wall.
Before and after
An empty room corner or drywall backdrop transforms into a vibrant, high-end celebration space once layered with dimensional florals.
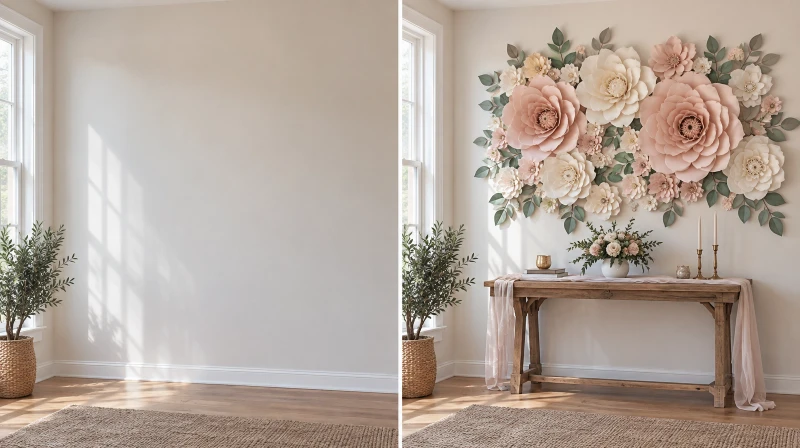 A plain white drywall surface transformed into an eye-catching photo booth and cake backdrop.
Surface-specific mounting and hanging
Because cardstock flowers are lightweight but top-heavy, match your hanging hardware to your wall surface:
- Painted Drywall: Wipe the surface clean with isopropyl rubbing alcohol (do not use household cleaners). Apply Command Poster Strips directly to the flat cardstock base circle. Press firmly for 30 seconds, allowing the adhesive bond to cure. When taking down, pull the adhesive tab straight downward along the wall to ensure clean, damage-free removal.
- Wood Paneling & Brick: Use heavy-duty double-sided removable mounting tape or press small removable adhesive putty balls behind the base plate.
- Pipe-and-Drape Fabric Backdrops: Use standard safety pins pinned through the back of the cardstock base plate directly into the fabric drape, or attach small magnetic disks.
- Portable Foam Presentation Boards: For a movable backdrop you can build on your dining table, hot-glue the flowers directly onto a tri-fold white foam presentation board, which can then be transported and hung anywhere with simple picture wire or easel stands.
Exact supplies and backdrop scaling guide
Scale your paper flower collection based on the physical dimensions of your photo area:
| Backdrop Display Width | Total Flowers | Large Blooms (16–18”) | Medium Blooms (10–12”) | Small Blooms (6–8”) | Leaf Sprigs | Cardstock Sheets | Estimated Prep Time |
|---|---|---|---|---|---|---|---|
| 4-Foot Cluster (Dessert Table) | 14 – 16 | 3 flowers | 5 flowers | 6–8 flowers | 8–10 leaves | 30 – 35 sheets | 3 to 4 hours |
| 6-Foot Wall (Standard Photo Booth) | 22 – 26 | 5 flowers | 9 flowers | 10–12 flowers | 16–18 leaves | 50 – 60 sheets | 5 to 7 hours |
| 8-Foot Wall (Full Wedding Arch) | 35 – 40 | 8 flowers | 14 flowers | 15–18 flowers | 24–30 leaves | 80 – 95 sheets | 8 to 11 hours |
Budget breakdown
Here is an itemized breakdown for crafting a full 4-to-5-foot paper flower backdrop:
| Item | What’s Included | Approx. Cost |
|---|---|---|
| Cardstock Packs | 2 packs of 65 lb colored cardstock (50 sheets ea) | $12.00 |
| Hot Glue Sticks | 20 mini all-temperature glue sticks | $3.50 |
| Command Poster Strips | 1 value pack of damage-free mounting strips | $5.50 |
| Backing Cardboard & Twine | Sourced from clean household shipping boxes | $0.00 |
Total Estimated Budget: approximately $21.00. Because all blooms store flat in boxes, your cost per party reduces to zero for future celebrations.
Worth it vs skip
- Worth It: Investing in quality 65 lb textured cardstock, curling every petal edge before gluing, and cutting individual base circles for structural stability.
- Skip: Using lightweight 20 lb printer paper, gluing flowers in rigid grid lines, and using standard cellophane tape (which drops flowers off the wall mid-party).
Small version
Short on time or space? Create a mini paper flower hoop: wrap a 14-inch wooden embroidery hoop or gold wire craft ring in floral tape, then mount two medium blooms, two small buds, and three leaves along one side of the curve. Hang it above a baby’s crib or centered over a dessert spread. Explore our dessert table backdrop ideas for complementary tabletop styling.
Make-ahead, transport, and storage
Paper flowers are exceptionally make-ahead friendly:
- Batch Production: Cut all petals on one evening, curl edges on the second evening, and assemble blooms on the third.
- Storage Strategy: Store finished flowers in shallow cardboard moving boxes. Separate flower layers with sheets of tissue paper or parchment to prevent petal tangling.
- Climate Control: Keep storage boxes in a dry closet or under a bed. Avoid humid garages or basements, which soften paper fibers and cause petal curl to relax.
- Pre-Party Touchups: Before mounting on party day, gently re-roll any outer petals that shifted during storage using a round pencil.
Beginner troubleshooting
- Why are my petals drooping or going limp? Your paper is likely too thin (under 60 lb) or the room is excessively humid. Stick to 65–80 lb cardstock and store finished blooms in dry conditions.
- Why is hot glue stringing everywhere? Hot glue guns create fine webbing when the nozzle cools slightly. Work in small sections, or pass a handheld hairdryer set on warm (low speed) over completed flowers for 3 seconds to instantly dissolve fine glue strings.
- Why do cardstock edges crack when curled? Paper has an internal grain direction. If you feel resistance or see cracking, curl in the direction of the grain rather than perpendicular to it, and soften the fibers by running the paper over the edge of a clean table first.
- Why are flowers falling off the wall? Painted walls collect invisible dust and oil. Always clean the drywall with isopropyl alcohol prior to applying Command strips, and ensure the back of your flower has a flat, rigid cardboard backing plate.
Common mistakes
- All-One-Size Syndrome: Crafting only 12-inch flowers produces a repetitive, artificial look. Always include small 6-inch filler buds to break up visual monotony.
- Skipping the Slit & Cup: Gluing flat petals directly to a circle creates a flat 2D wheel rather than a lush 3D blossom. The bottom slit is essential for dimensional lift.
- Ignoring the Wall Texture: Heavy orange-peel or popcorn texture prevents adhesive strips from bonding. For heavily textured walls, mount flowers onto a lightweight foam board and hang the board using conventional picture hooks.
Backdrop checklist
- 65–80 lb cardstock purchased in coordinating palette tones
- 3 statement blooms, 5–6 medium blooms, and 8+ accent flowers assembled
- Petal edges curled with a dowel and bottom slits glued for 3D cupping
- Sturdy cardstock backing plates attached to the rear of every bloom
- Dry-run floor layout photographed for assembly reference
- Wall surface cleaned with isopropyl rubbing alcohol
- Command poster strips pressed for 30 seconds per mount
- Shallow storage box and tissue paper ready for post-event preservation
FAQ
What is the best weight of paper for DIY paper flowers?
The ideal paper is 65 lb to 80 lb (176 to 216 gsm) cardstock. This weight is rigid enough to hold sculpted curls and maintain structural dimension without drooping, yet pliable enough to cut cleanly with craft scissors or digital cutting machines.
How many paper flowers do you need for a full photo backdrop?
For a standard 4-to-5-foot decorative wall cluster, you need approximately 15 to 18 flowers (3 large, 5 medium, and 7 to 10 small) plus 10 paper leaves. For a full 8-foot wedding wall, plan for 35 to 40 mixed blooms.
How do you hang heavy paper flowers without peeling wall paint?
Clean the painted drywall with isopropyl rubbing alcohol, let dry, and apply removable Command poster strips to the rigid backing plate of each flower. When removing, slowly stretch the adhesive tab straight downward parallel to the wall to release the bond cleanly without stripping paint.
How long does it take to make a complete paper flower backdrop?
A 15-flower backdrop typically takes 3 to 5 hours of hands-on crafting time. You can significantly accelerate assembly by using a digital cutting machine (Cricut/Silhouette) to cut petals in bulk, cutting your assembly time down to under 2.5 hours.
Can you use a hot glue gun on paper flowers?
Yes, all-temperature or low-temperature hot glue is the preferred adhesive for paper flowers. It bonds cardstock fibers in under 10 seconds, allowing you to layer concentric petal rings rapidly without slipping.
How do you store paper flowers so they don’t get crushed?
Store finished flowers flat in shallow cardboard boxes or under-bed plastic bins. Layer tissue paper between blooms and avoid stacking more than two layers deep. Keep in a climate-controlled room away from humidity.
Can paper flower backdrops be used outdoors?
Paper flowers should only be used outdoors in dry, mild weather. Even gentle breezes can catch large petals like sails, and outdoor humidity or moisture will cause petals to soften and wilt. If hosting outside, anchor blooms to a heavy plywood frame weighted with sandbags.
Related articles
- 15 Party Backdrop Ideas
- DIY Photo Booth Backdrop Ideas
- Dessert Table Backdrop Ideas
- DIY Tassel Garland Tutorial
📌 Pin this for later!